
Over the years, I’ve posted hundreds of tutorials using PowerPoint. Today I am going to cover five ways to use PowerPoint as an image editor. PowerPoint is great for quick image editing or for those who don’t have other image editors available.
Save PowerPoint Content as an Image
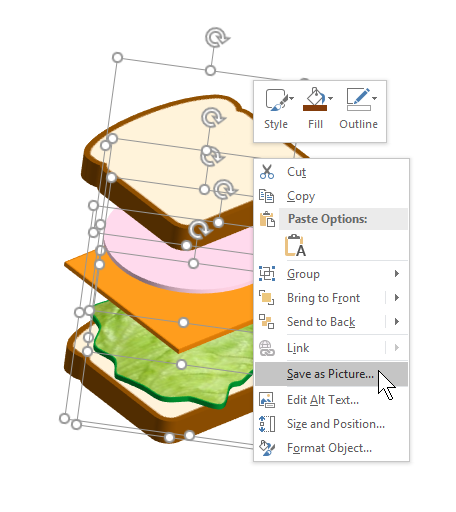
Since we’re talking about PowerPoint as an image editor, the first tip is that whatever you create in PowerPoint can be saved as an image.
I usually group the objects so it’s one group. And then I right-click and save as picture. I like to save as a .PNG so that the transparent areas of the image are still transparent. If you save as .JPEG, the transparent areas will become white.
In the image below, I used PowerPoint to create the sandwich stack and then right-clicked to save as picture.
Create Custom-Sized PowerPoint Slides
You can make a PowerPoint slide any size you want. By default, they’re 16:9. That and 4:3 are the most common aspect ratios. However, by going to the Design Tab you can set the slides to any size. That means they can be tall and skinny or short and wide.
Why would someone want to do that? Check out the tip below.
Export PowerPoint Slides as Images
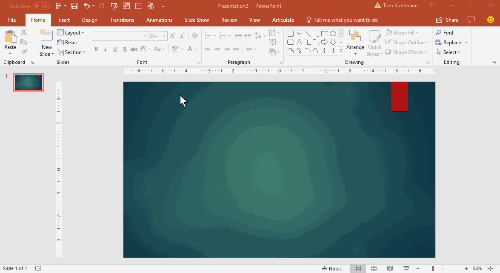
PowerPoint slides can be saved as images. That means you can add whatever you want to a slide, layer content, etc. and then save that slide as an image. I do this quite a bit when I need to quickly build graphics for my e-learning courses.
For example, the flashcard interaction in Rise is a 1:1 aspect ratio. So I make a PowerPoint slide that is 1:1 and add my content to the slide. It’s a great way to add titles and images to the flashcards to make them visually richer.
Once I’ve completed the slide, I save the PowerPoint slides as images (File – Save As and select an image option such as PNG or JPG) and insert them into the Rise interaction.
Using PowerPoint slides to create images is easy and it gives me more control over the images I use in my e-learning courses.
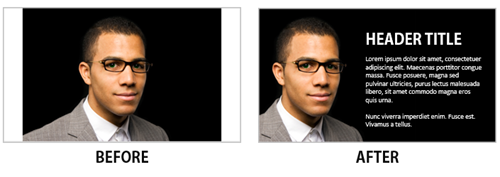
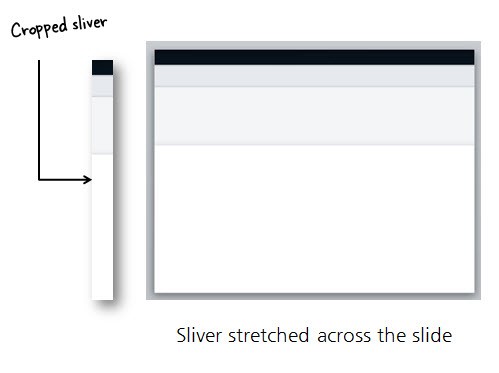
How to Extend a Photo’s Background
Sometimes you have images where the object is centered which makes it challenging to place other content on the screen. An easy way to fix this is to cut a slice from the image and stretch it. This lets you move the main object over and get some empty space for text or other content.
I also use this technique to quickly build slide layouts which I showed in this previous blog post on how to create a template from a single image.
Tutorial: here’s a PowerPoint tutorial where I show two ways to extend the image: one where it’s really easy and one where the image doesn’t quite cooperate.
How to Remove Image Backgrounds in PowerPoint
Since PowerPoint 2010, you can use PowerPoint to remove backgrounds from your images. For the most part, it works well. Select your image and the remove background. You can select areas to keep and areas to remove. Once you’ve removed the background, you can play around with softening the edges to get rid of any obvious jaggedness.

Tutorial: how to remove backgrounds of images in PowerPoint. Here’s an additional series of tutorials to help you customize how you use the background removal for effects.
As you can see, PowerPoint is a great tool for building simple illustrations or using it for quick graphics editing!